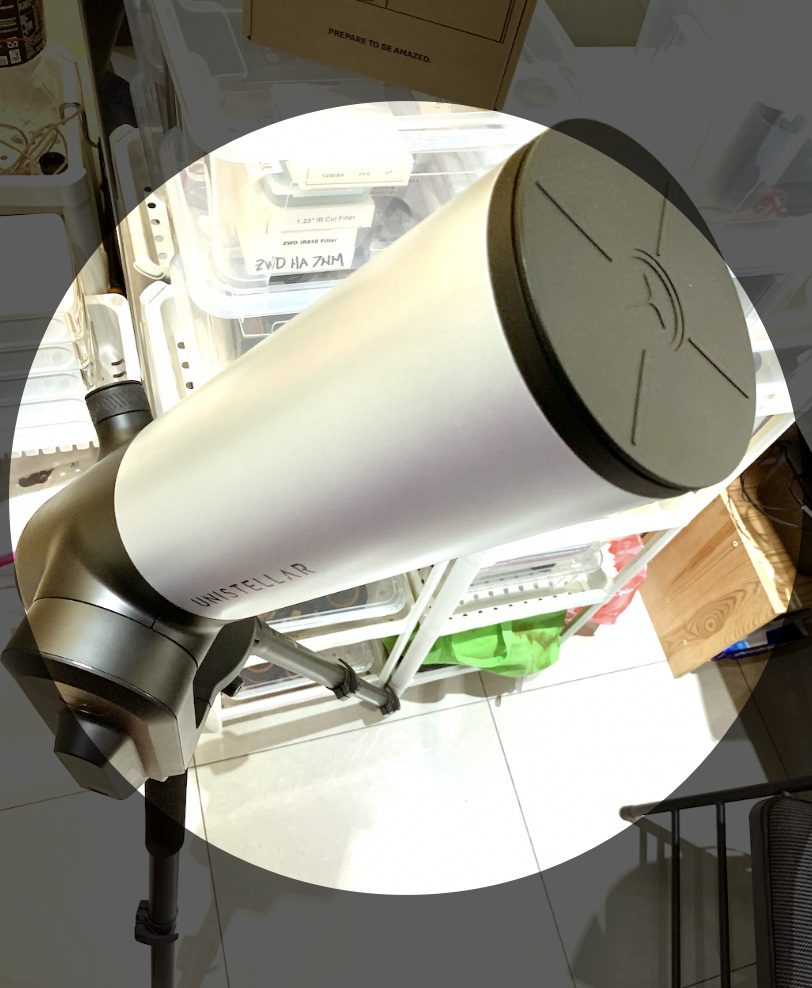
This story does not end well. The defective digital eVscope could not be fixed and it was given up, sent back to the dealer for refund.
Friday, December 11, 2020
Demise of the Defective Digital Evscope
This story does not end well. The defective digital eVscope could not be fixed and it was given up, sent back to the dealer for refund.
Friday, September 18, 2020
Unistellar Evscope Aftermath

![]() |
| The night sky is perfect for running a new working eVscope through its paces. Visible is M42, and bright stars like Sirius, Capela, Rigel, Betelgeuse, and Aldebaran at around 4:30 am local time. |
In the aftermath of receiving a non-functional eVscope through OPT telescope dealer in the USA, I waited over 20 days for a replacement MicroSD card from Unistellar.
Thursday, September 17, 2020
Unistellar Evscope After Card Install
Wednesday, September 16, 2020
Evscope Card Replacement
If you have the beautiful and amazing new eVscope and Unistellar has determined it needs new software for proper functioning, a replacement microSD card may be needed. This is the story about how the card was replaced.
Remove the eVscope from the tripod and set it on a firm table with a special anti-slip grip matt. I used this arrangement to prevent any slippage during work and in the event of a sudden earthquake.

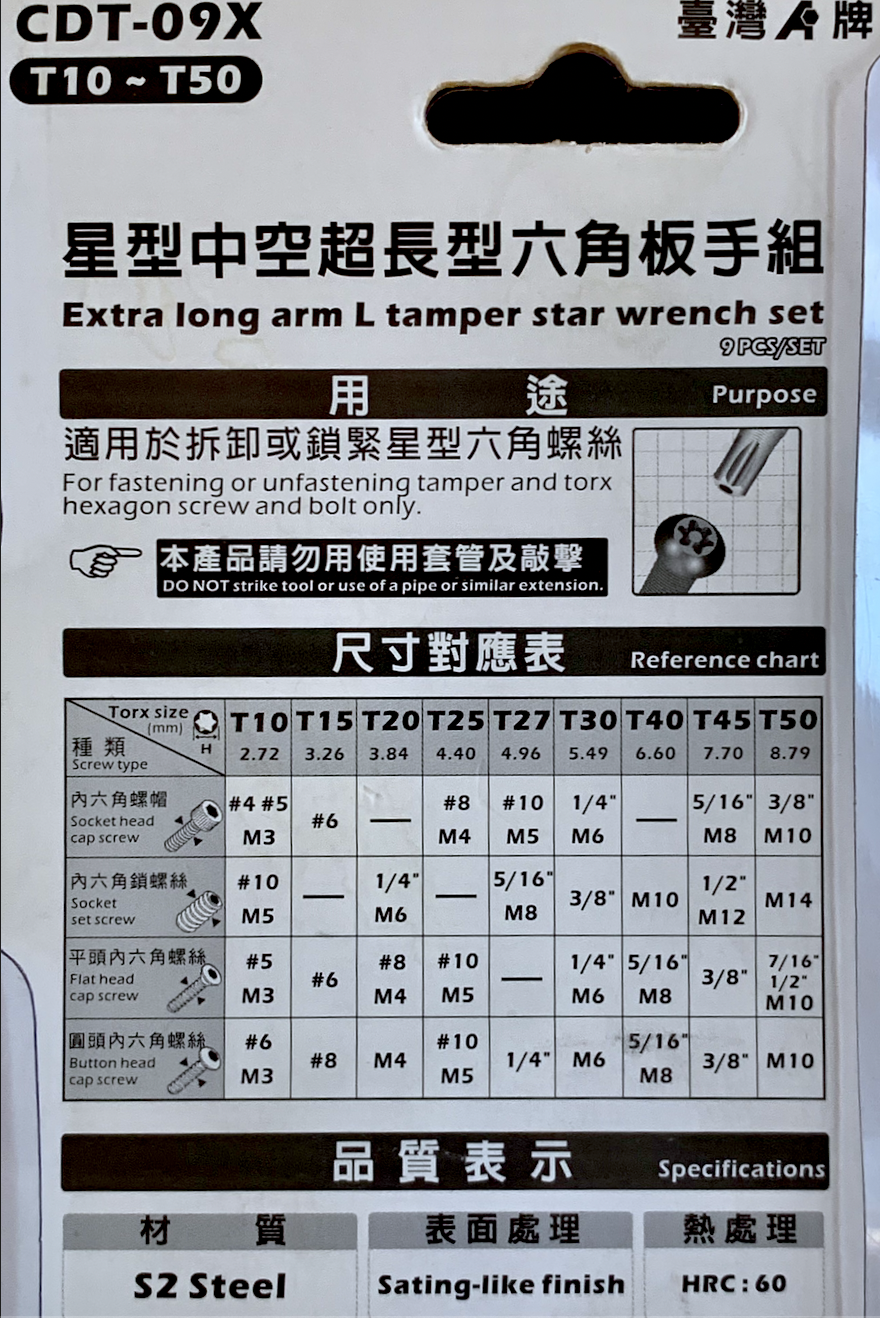
The security screw removal tool is everything - Taiwan makes this amazing TORX tool set forged from S2 Steel. One side is T10 Torx and the other side is TT10 Torx. The TT10 side has a center hole for removing the two security screws on the Unistellar telescope. (the security screw has a center peg) This Alstrong Tools Corp. www.alstrong.com toolset, made in Taiwan, was in stock and purchased today at a local hardware store in Taipei. It was conveniently located down the street, for only $13, a real bargain! The nine piece set name is "Extra long arm L tamper star wrench set, part number CDT-09X." Now it's time to remove the two screws, located one on each side of the telescope label.

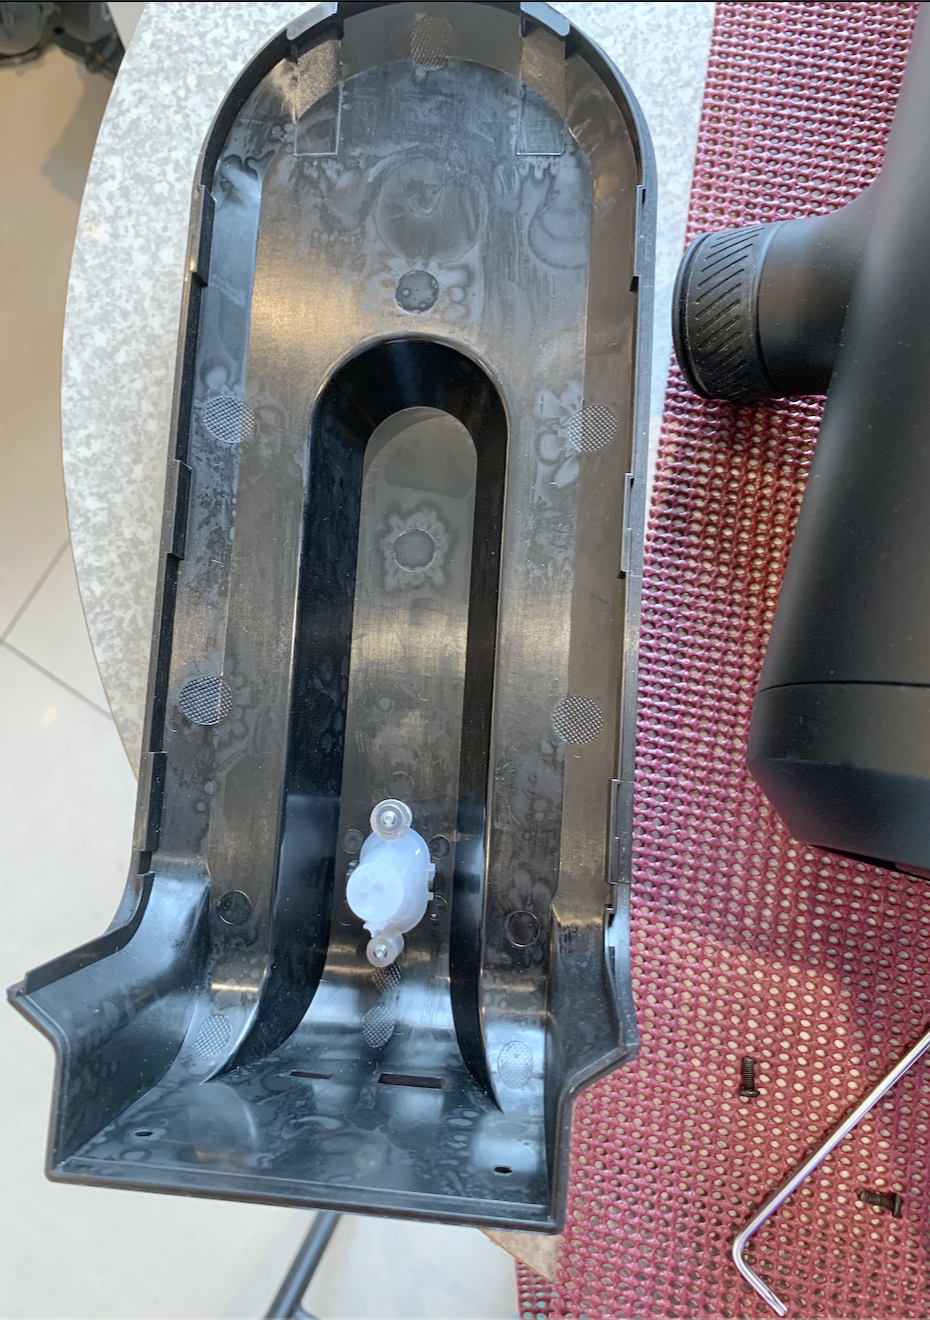
With the two screws removed, slide the top cover plate, which includes the power switch, back towards you and remove it. Be very careful not to force anything.


You can see the second board under the top board. In the center is the microSD card. Fingers were used to feel the sensitivity of the card, its position, and then it was grabbed and gently removed. Then immediately, the new card was inserted, observing the cards position, top and bottom. Tools were not used to grip the tiny card as it could easily become flexed and damaged if using metal tools on it. Sometimes metal tools become magnetized and these can damage, modify or erase data stored on the card internally. Use common sense and exercise caution.

Now put the cover back on and install the screws. These screws have only slight pressure to hold in place. Now put the evscope back on its tripod do the first test - push the power button and hold a few seconds. The purple light will come on, release the switch, the light will stay on a short time followed by constant red light and you're good to go! The telescope should successfully boot up with the new software on the new MicroSD card.
When outside, remember to take a dark frame, then run more tests with the latest version app, take pics, etc. - ultimately focus on a bright star using the Bahtinov mask and also collimate the primary mirror. It's raining now but at 4am we're scheduled to have a beautiful clear sky with Venus and the Orion Nebula climbing high. We'll report how this goes in more blogs so stay tuned!
Tuesday, September 15, 2020
Evscope Security Screw
Unistellar and telescope owners loosely recommended a T10 Torx screwdriver to remove the telescope housing and replace the SD card. This is not precisely true. As T10 is a security screwdriver, I checked and had these in my toolbox and didn't give it any more thought. However, after the card arrived on Tuesday September 15th, I prepared to remove the telescope case and suddenly the screwdriver did not fit.
![]() |
| Actual screw on the eVscope that needs removal. A TT10 tool is needed - the screw has a center pin. |
![]() ![]() |
| At left, This is a T10 that will not work to remove the eVscope screw. At right, this is a TT10 screwdriver incorrectly labeled as a T10. |
Sunday, August 30, 2020
Evscope Card Waiting
This is a record log of waiting time to receive the eVscope micro sd card with the correct software from Unistellar company, to be installed inside the defective new smart telescope to replace the card with the defective software.
Currently the telescope does not work and the LED is stuck on the steady purple light indicating the scope will not boot or function properly.
![]() |
Unistellar eVscope founders: left to right, From right to left: Antonin Borot, Arnaud Malvache, Laurent Marfisi, Franck Marchis. November 2017 in Aix-en-Provences. Photo Unistellar |
![]() |
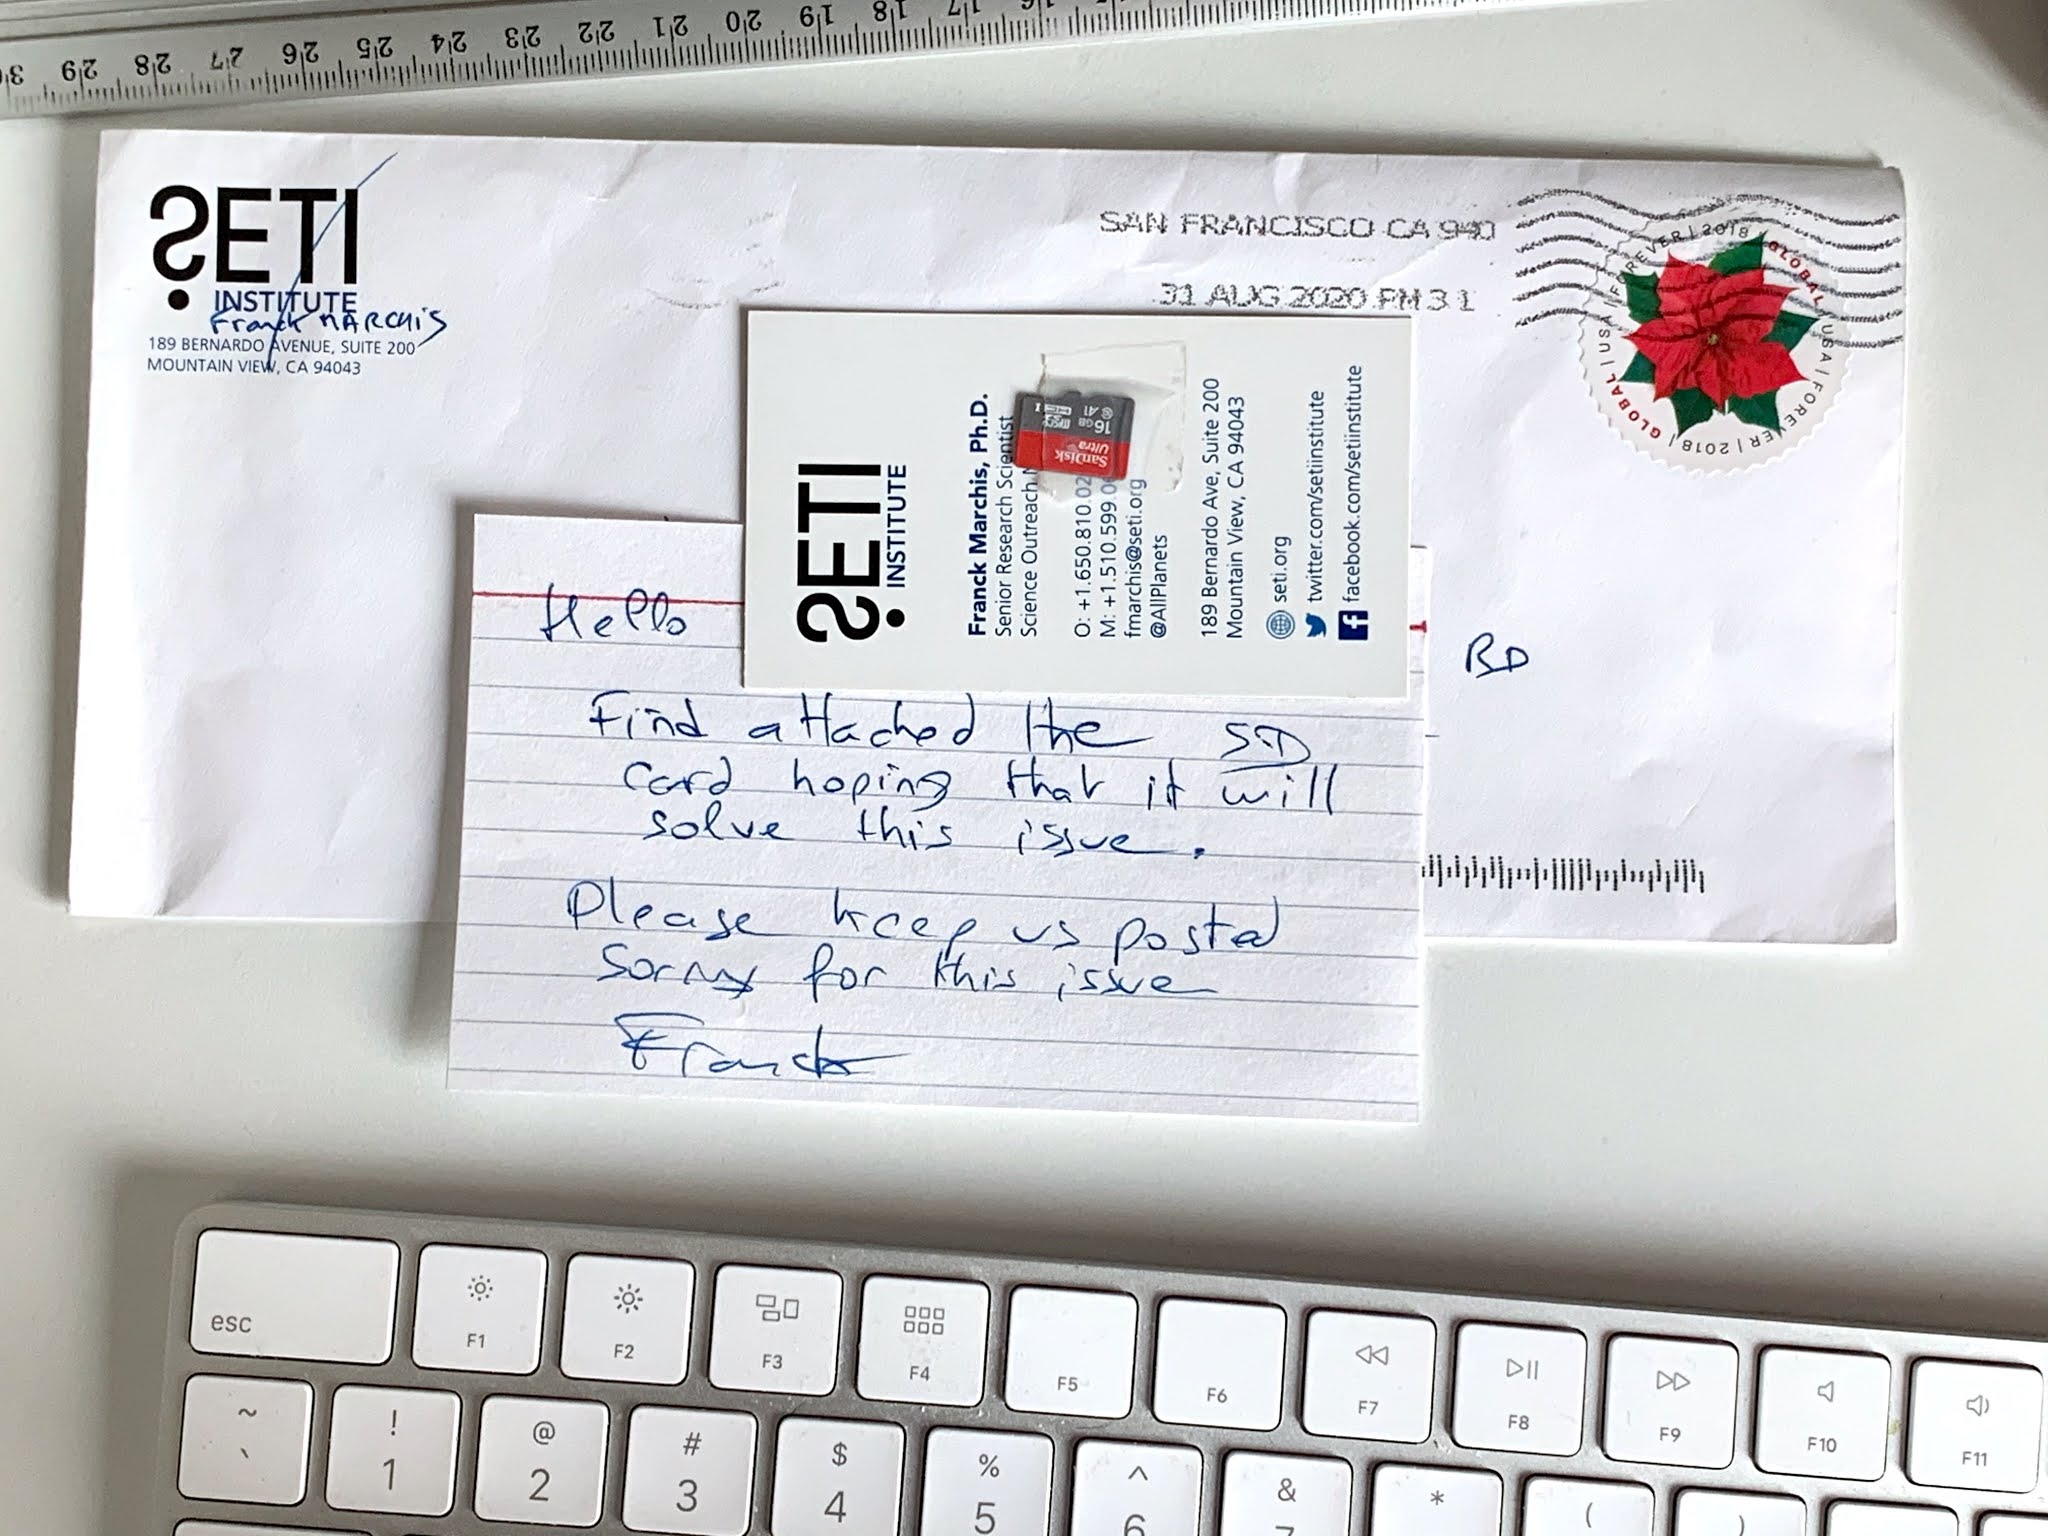
| The SD card was shipped USPS from San Francisco by Dr. Franck Marchis, an original founder of Unistellar and the eVscope, along with a personal note handwritten on an index card. |
Checkmark indicates waiting for the card
✔︎ Saturday Aug. 30 NO CARD
✔︎ Sunday Aug. 31 NO CARD Card actually shipped
✔︎ Monday Sept. 01 NO CARD Trevor: Shipped today
✔︎ Wednesday Sept. 3 NO CARD
✔︎ Thursday Sept. 4 NO CARD
✔︎ Friday Sept. 5 NO CARD
✔︎ Saturday Sept. 6 NO CARD
✔︎ Sunday Sept. 7 NO CARD
✔︎ Monday Sept. 8 NO CARD
Evscope Smart Telescope Analysis
![]() |
| eVscope Telescope Innards Hardware The eVscope is powered by a Raspberry Pi board with the LINUX operating system and that means one thing - filesystem on an SD card. The smart telescope has these two electronic cards. At the right is a telescope controller board by Unistellar and at left is the stock Raspberry Pi 3 computer. When we disconnect Unishield from the Raspi, we can see the bottom side of the PCB with a dsPIC33E microchip responsible for control of the motors. The Unishield also contains a LSM6DSM gyroscope/accelerometer module. Image found on internet at a reverse engineering site. Computer and Interface The Raspberry Pi does not use its DSI display interface, audio jack, or any of the USB ports. It gets power via GPIO pins from the Unishield, which is then directly soldered to a battery. The GPIO is also used for communication with the Unishield, e.g. to control the azimuth/altitude motors. The camera stream goes from the IMX224 sensor's board to the Unishield via an HDMI cable, and the data is then forwarded to the Raspberry Pi through the CSI camera interface. This is the same ribbon cable connector used by the official Raspberry Pi camera module (which uses IMX219, a different Sony sensor). Raspberry Pi then uses its own HDMI-out to display the starfield in the eye-piece, which is powered by an OLED display. Software We see 4 partitions. Partition 1 and 2 are identical, and one of them likely acts as a fallback in case of a failed firmware update. Partition 3 contains a fairly large (3.4GB) SQLite database called afdstarmap.db, which holds information about objects in the sky. This database is used by the telescope to figure out where it should point itself. The 4th and largest partition is also the only one that is used for storing user data, e.g. observations that can be later uploaded to Unistellar for research purposes. Partitions Partitions 1 & 2 are the ones we'll focus on first. We see a fairly standard setup for a Raspberry-based device. cmdline.txt and config.txt are used for interfacing with the firmware and it's where you set low level hardware preferences for different system buses and/or features of the SoC. evscope.dtb contains a device tree, describing all the different hardware features of the board(s). I've linked to the decompiled device tree in the hardware section. Then we have evscope.fw, which is the most important file of all - it contains the whole Linux system that powers the machine. Because the system is booted from a firmware file rather than a regular filesystem, runtime changes are not written back and the system is restored to its previous configuration on every reboot. Boot Upon boot, Partition 3 gets mounted as /media/ro, while the user-data Partition 4 gets mounted as /media/rw. Hardware System platform: Raspberry Pi 3 A+ Custom board: Unistellar Unishield (Rev P) Camera sensor: Sony IMX224 Storage: 16GB SanDisk micro SD card Raspberry Pi Computer https://www.raspberrypi.org/products/raspberry-pi-3-model-a-plus/ Sony IMX224 https://www.sony-semicon.co.jp/products/common/pdf/IMX224.pdf |
Friday, August 28, 2020
Evscope Update
Friday August 28 2020
I think it's good news. I just need to have super patience and bide my time for a half month.
Today, Unistellar claims to have contacted a colleague in San Francisco to ship a card with the correct software to my address in Taiwan. Yesterday, they didn't know if they would ship the card to Taiwan for some unknown reason. As explained today, shipping will take up to 2 weeks, contrary to my request for faster shipping from which I would pay all expenses.
To top off the letter, Trevor states I might never get the card due to Covid-19. Not exactly any vote of confidence. So now I must wait up to a half month and go from there. Thus far, my impression of the company Unistellar is like a roller-coaster ride of ups and downs, highly mixed. I did get a PDF file with instructions on taking apart the telescope and replacing the micro sd card. it looks like a piece of cake. As far as the dealer OPT is concerned, my email went unresponsive. I believe they are simply standing by for a potential return and refund. OPT is an outstanding telescope dealer and have always backed their products.
Others have said companies are fast to take your thousands of dollars no matter where you're located, but when a problem happens, solutions are extremely slow in coming. So for now, the failed eVscope is still failed and I have full confidence that after the card is replaced with new software, the telescope will work flawlessly as advertised. It will be very exciting to begin deep sky imaging through light pollution.
Wednesday, August 26, 2020
Unistellar Evscope Update
Unistellar agreed to send out a micro sd card with updated software and a tool to open up the telescope to repair it. This was according to email received on Tuesday August 25th 2020.
However the next day, today, the shipment was held up. According to Trevor, he did not realize, per my shipping address, that I was located in Taiwan and apparently this poses some problems for their logistics. What problems I wonder? Therefore, there is more delay. How hard is it to send a tiny little micro sd card that weighs almost nothing?
It's also very strange that I contacted Unistellar previously, and got their permission to buy the telescope in the USA and use it in Taiwan. So there should be no problem and no delay. I wonder how long antics will go on? Unistellar is an unusual lot and I'm thinking of returning the telescope to the telescope dealer for a full refund.
Evscope Kiss of Death
After five days of wrestling with the new eVscope from Unistellar and trying to get it to work, with back & forth correspondence with Unistellar and OPT, the scope finally locked up with the steady purple power button light, never changing to constant red which would indicate the scope is ready for use. The purple light is much like Microsoft Windows blue screen kiss of death.
I contacted Unistellar and corresponded with Trevor who quickly realized my telescope needs for a software update and that I would need the micro sd card with the latest and greatest incarnations of upgraded software, and a security tool to open the telescope for surgery. We (telescope and I) are waiting for the arrival of the card and tool to begin our telescope rescue with the needed brain surgery.
Someone should have a talk with telescope dealers who do not check their merchandise for functionality and suitability for resale. This is the second defective telescope I've received over the past couple years. What can we expect with the majority of industry products now made in China but not checked for functionality. According to Unistellar, the telescopes parts are apparently made in France or Europe, then assembled in China.
Sunday, August 23, 2020
Evscope New Permanent Problem
The telescope developed a new permanent problem. It won't start up. I took the eVscope out again and pushed the power-on button. The steady purple light came on. It never turned red. I tried the process numerous times and also waited short and long times. The result is always the same. No red light. I waited until the next day. Same problem. The telescope is stuck. Yes, it's fully charged. On the bottom of the telescope it says "model 1." Maybe this early model needs a software update. I contacted Unistellar - waiting for a reply.
Saturday, August 22, 2020
Evscope Anomalies
Wednesday, August 19, 2020
Random Thoughts
![]() |
| The eVscope app will compensate for light pollution when "City" is chosen. Other options include Suburb and Countryside. |
| When you have an image you like, you can save it with this "save image" or "download photo" icon. You can also use a screen capture, or pinch enlarge the image and then screen capture it. |
TIP: I have confirmed the telescope won't boot up when the house wifi is dominating the signal. You must turn off the house wifi and the telescope will boot properly in about 5 seconds.
TIP: The fastest telescope in Asia! - I keep the eVscope inside assembled with the tube on the opened tripod. Then before observing, carry the telescope outside through the opened sliding glass patio door and set it there. It takes about 3 seconds to do that! I use the iPhone flashlight to look at the level bubble and confirm it's centered - about 10 seconds. Then the telescope can set there, with the tube cover removed, for about a half hour to reach thermal equilibrium.
TIP: Mercury vapor lights from the ballpark, shining directly on the front of the telescope tube, will cause image noise and pink color stripes. Make sure there are no lights shining on the telescope.
I had pressed a GOTO button and before the new scope disconnected it slewed directly to Neptune and placed it in the center field of view! The potential for this telescope is tremendous!
In removing the Celestron, once again there is confirmation about this system being too large and heavy to handle. Just breaking it down into the basic pieces to bring inside took around an hour. On the other hand, the eVscope is just hand carried outdoors and ready to go in three minutes.
Tuesday, August 18, 2020
Evscope Problems Outdoors
![]() |
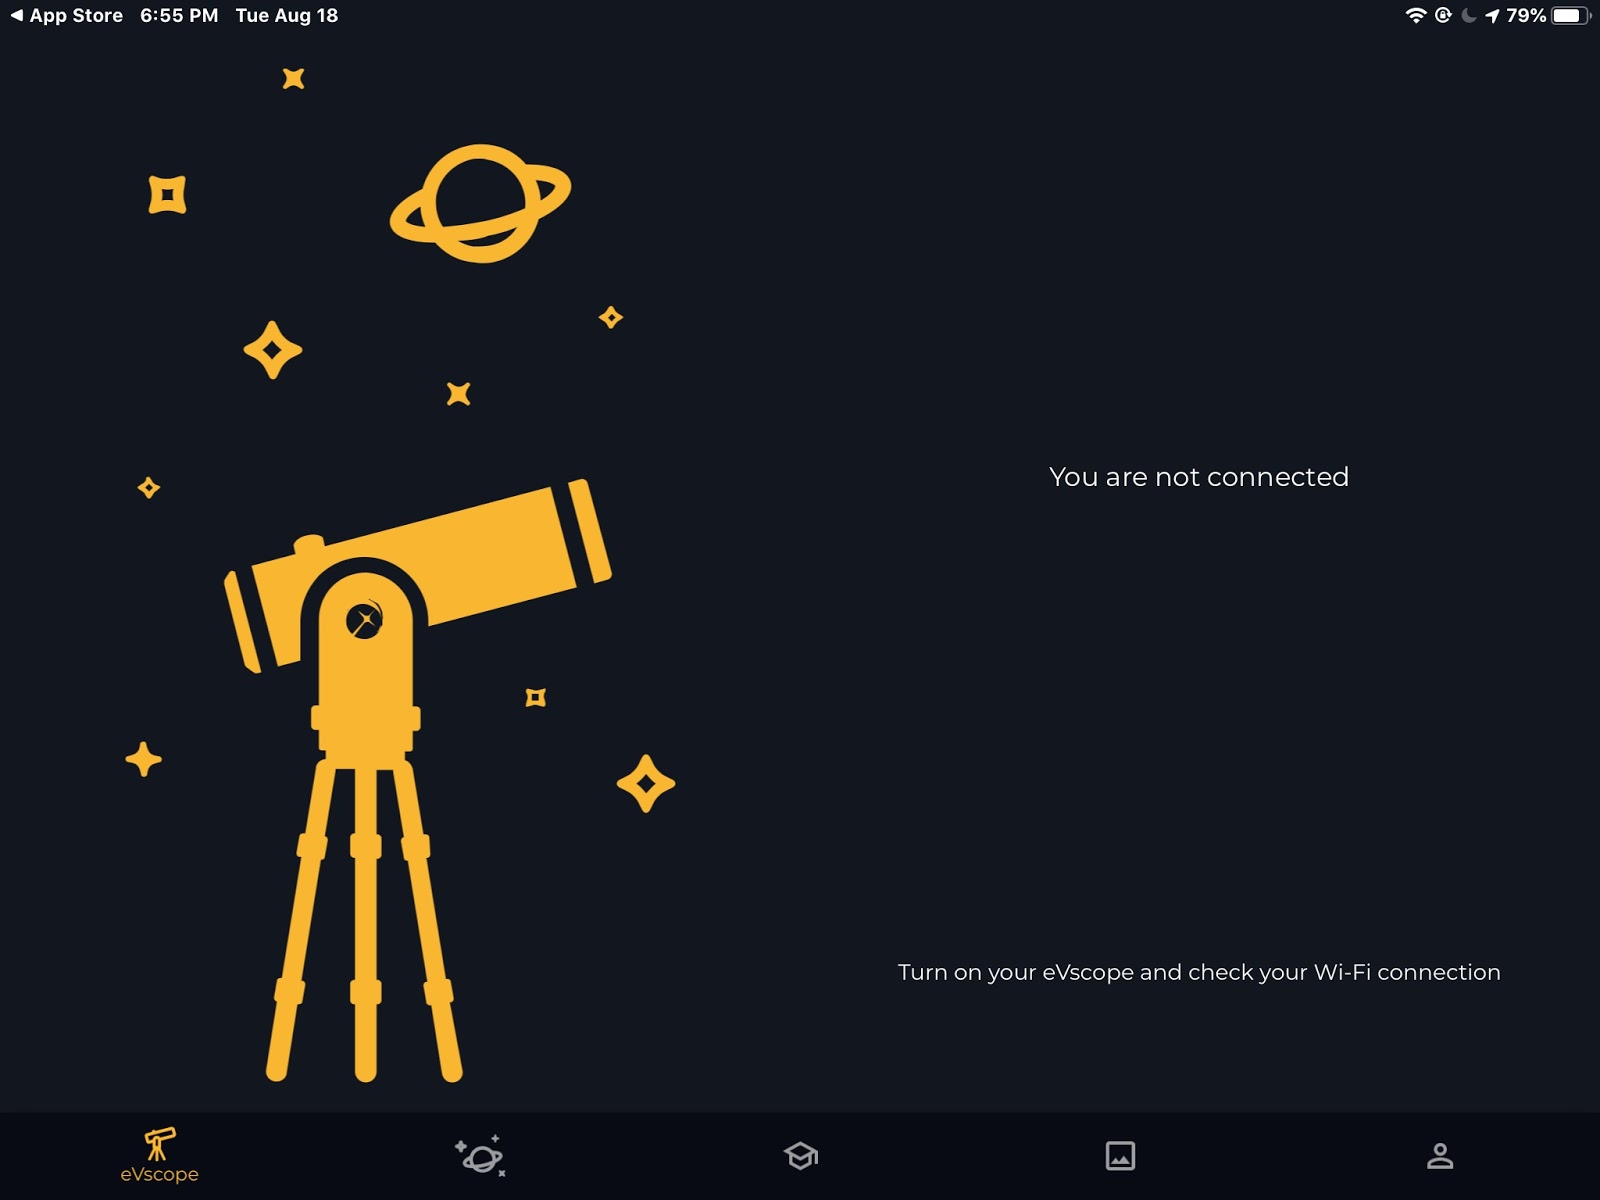
| This is the dreaded and infamous "you are not connected" screen. Turning on the Evscope and checking the wifi connection did nothing to fix the problem. |
The Evscope was received on Monday afternoon and problems were noted that evening when taking the Evscope outdoors Monday night.
On Tuesday afternoon, the scope started to connect and it seemed it was working. However, Tuesday night led to problems again. At one point, it seemed to find Neptune with a lot of noise across the FOV, then immediately crashed and the image was lost forever. Thereafter, the telescope stopped booting, stopped connecting to the app, and was completely unstable and unusable. Both OPT and Unisteller were contacted on Tuesday. A telescope tech from OPT with Evscope experience immediately responded with email on Wednesday and we are setting up a time for an international phone connection for troubleshooting the telescope.
Evscope Working Indoors
I never gave up, and in working more with the Evscope (indoors today of all things), I made super progress getting it to work indoors, with several discoveries on my own, none covered in the manual or guides or online forums... and even got the telescope to form images in the house!!!
Soon, if clear tonight, I may have the Smart Telescope fully working and taking sky images with First Light. Here's what I found to get the eVscope working:
* There was a problem with iPhone standard evscope app on the App store. It does not work. You need to select a different app. Choose the optional one for developers with the 1.06 version that says utilities, and which states this is the latest version.
* First, when you start the telescope, the power button will turn purple and you must hold down the power switch long enough until it remains purple. Then release and monitor the color for about 5 minutes until it turns red. This is the boot time for the telescope. When red, the telescope is ready.
* Next, access the phone to activate the Wifi and select the Evscope Wifi signal. Pay no attention to the warning that internet is not connected. You don't need internet to operate the telescope, do observing and imaging. Quickly launch the Evscope app and the telescope will connect.
* When connected the telescope icon view will be see, see photo above, and the telescope will be in Live View mode with tracking off.
* Then, using the joystick controls, tip the telescope down a little to see stars. Then press the bullseye icon add it will begin to activate Sky Tracking.
* Now with Sky Tracking on, you can move to the next icon (the ringed planet with 3 stars, and then select goto the first star. This is to focus on a bright star and you can use the Bahtinov mask for a perfect focus.
* After focus, you can goto the object you desire, and select Enhanced Vision where the scope will take 4 second exposures and continue to add together until the image becomes better and better, some even to the point of significant color.
* When the image is fully cooked, based on your taste, it can be saved through the menu with the square icon.
* Also as a backup, I would highly recommend using apple iphone screen print to save the image of the entire phone screen. As seen in the screen capture photo above, the image will be in a nice rectangle format but without the text data.
TIP: You might be able to turn the iphone or ipad sideways which will create a larger image for screen capturing. Orientation may also remove the app icons from the face of the image which is greatly desirable for an unobstructed photo.
TIP: How to iPhone screen capture. Left side, press the volume up button and the right side button at the same time.
Tip: Turn on iPhone flashlight
Swipe fast from top right to bottom left & see flashlight icon
* Pinch the image to get progressive zoom and larger images which can also be saved but only through screen capture.
* Alas, when you go to the menu to park the scope, it will automatically move to the home position (tube up and down with the mirror at the bottom) and shut itself off automatically.
Monday, August 17, 2020
Evscope Not Working
The eVscope was received on Monday August 17th, 2020 at 12:30 pm. That evening I took the scope outside to test it with a clear sky. In summary, the telescope would not connect to the app.
evscope problem
New scope won't connect to app, the app says there is no internet connection and the signal strength bars have an exclamation mark through the center. The wifi evscope name shows up on the phone and also says no internet connection. I can select the scope's wifi name on the phone but it won't connect to the app. I tried both the phone and the ipad. I rebooted the app. I reinstalled the app. I shut off the house wifi, modem and router. I reset the phone. The scope is fully charged. Turn on the scope and the power switch is purple, then it turned red later. Seems intermittent. I tried 3 different phones. Randomly, suddenly, it seemed to start and the power switch turned red. But not function correctly and unstable. Then the telescope could move. But sometimes the the control arrows are deselected and it won't move. Then it disconnects. I am standing next to the scope. The image is pink noise with a narrow band through it. Same appearance in the eyepiece. When not connected there is no screen noise.
I noticed the eVscope is model 1. After three years of crowdfunding and shipping a claimed 2,500 telescopes, I expected a new, updated and working telescope. It appears others had the same problems with the early version telescopes.waloszek.de/astro_us_evscope_fe_e.php
I expect my scope has the same problems GERD WALOSZEK mentioned at his web site, and will need all new software. As shipping was $260.00 and tax was $300.00, I don't want to repeat those expenses, so I intend to do a repair at this location. I contacted Unistellar and OPT today. I noticed after the one unit was sold to me by OPT, the OPT web site indicated there were no more in stock and the units would be drop shipped.
Evscope First Impressions
First Impressions
These are my first impressions on the first day the telescope was received via UPS (at 12:30 pm Monday Aug. 17, 2020).
The telescope is more substantial than I expected. Construction and design is at expert level with attention to all details. If Steve Jobs made the iTelescope with beauty and form and superb function, this would be it. It's fully worth the amount of money paid for it. This is obviously a class telescope in a league of its own yet clearly designed by a serious astronomer.
The tripod is very substantial and steady, strong, and superbly designed. There is not doubt it will support the telescope well in a strong breeze.
Assembly takes about three to ten seconds, quite remarkable in design. The mount is steady, even with the tripod legs fully extended.
Inspection reveals a telescope in mint condition, expertly designed, one that an astronomer would be proud to own. Both the tripod and OTA weight about 20 lbs. yet both are extremely sturdy and mass stable.
When received, the battery will need charging. Estimates put charging time around 6 hours.
Sunday, August 16, 2020
Evscope Unboxing
Listed as 31 lbs. on the Bill of Lading, the eVscope came inside this wear & tear outer box. The telescope and tripod mount are around 20 lbs., ideal for portability. Already several trips are planned to the mountains where the sky is exceptionally dark for deep sky imaging.
As the bag is not airport regulation for air flights, I opted not to purchase it. However, the foam inside the box will nicely adapt to custom fitting luggage.
The package includes the optical tube assembly, the tripod mount, instructions, quick start guide, and a small box with a set of tools in a pouch and the charger. The charger has plugs to accommodate many countries.
Inside is the box that holds the scope and packaging styrofoam and with the logo "Prepare to be Amazed."

First the scope needs charging. The charger plugs into the small USB connector as shown. The larger USB port is for charging the phone. According to the LED color and the steady state, the telescope fully charged in 5 hours.