Wednesday, November 25, 2020

Make Your Own Military Grade Image Intensifier

Make Your Own Military Grade Image Intensifier

All you need is a new iPhone and the latest incarnation of image intensifier apps

Night vision image intensifiers are used by the military to view objects in total darkness by amplifying a few photons. Now declassified technology, one can pick up a new or surplus image tube intensifier for several hundred or a few thousand USA dollars. But why do that when you can get a free phone app to do the same.


Now enter into the year 2020 where you can find almost anything in the  form of a free app for your iPhone. MilkyCam is that app. It amplifies a totally dark sky, turning it into daylight by boosting the ISO by thousands of times. For this experiment, I tried three similar apps, each with slightly different features. The goal of this experiment is to determine the amount and direction of light pollution remaining at night during the darkest sky.


Taiwan Study

This study will determine nighttime sources of light pollution using an image intensifier app for a new Apple iPhone in the Taipei Taiwan area. The photos are shot with a handheld iPhone Xs Max and the app MILKYCAM set to the extremely fast ISO rating of 1,856.  All photos have no processing. The image intensifier app is so powerful, it can take these images from a night view, to full daytime, and complete whiteout appearances. Aside from studying nighttime light pollution, the intensification app is also used for determining an analysis of clouds during the night, and spot checking the position of stars and celestial objects. Processing can remove grain and light pollution and the app can control the size of stars in the image. Pinpoint stars may disappear against the background photo noise and grain, but a slight enlargement of star diameter will bring stars into better visibility.


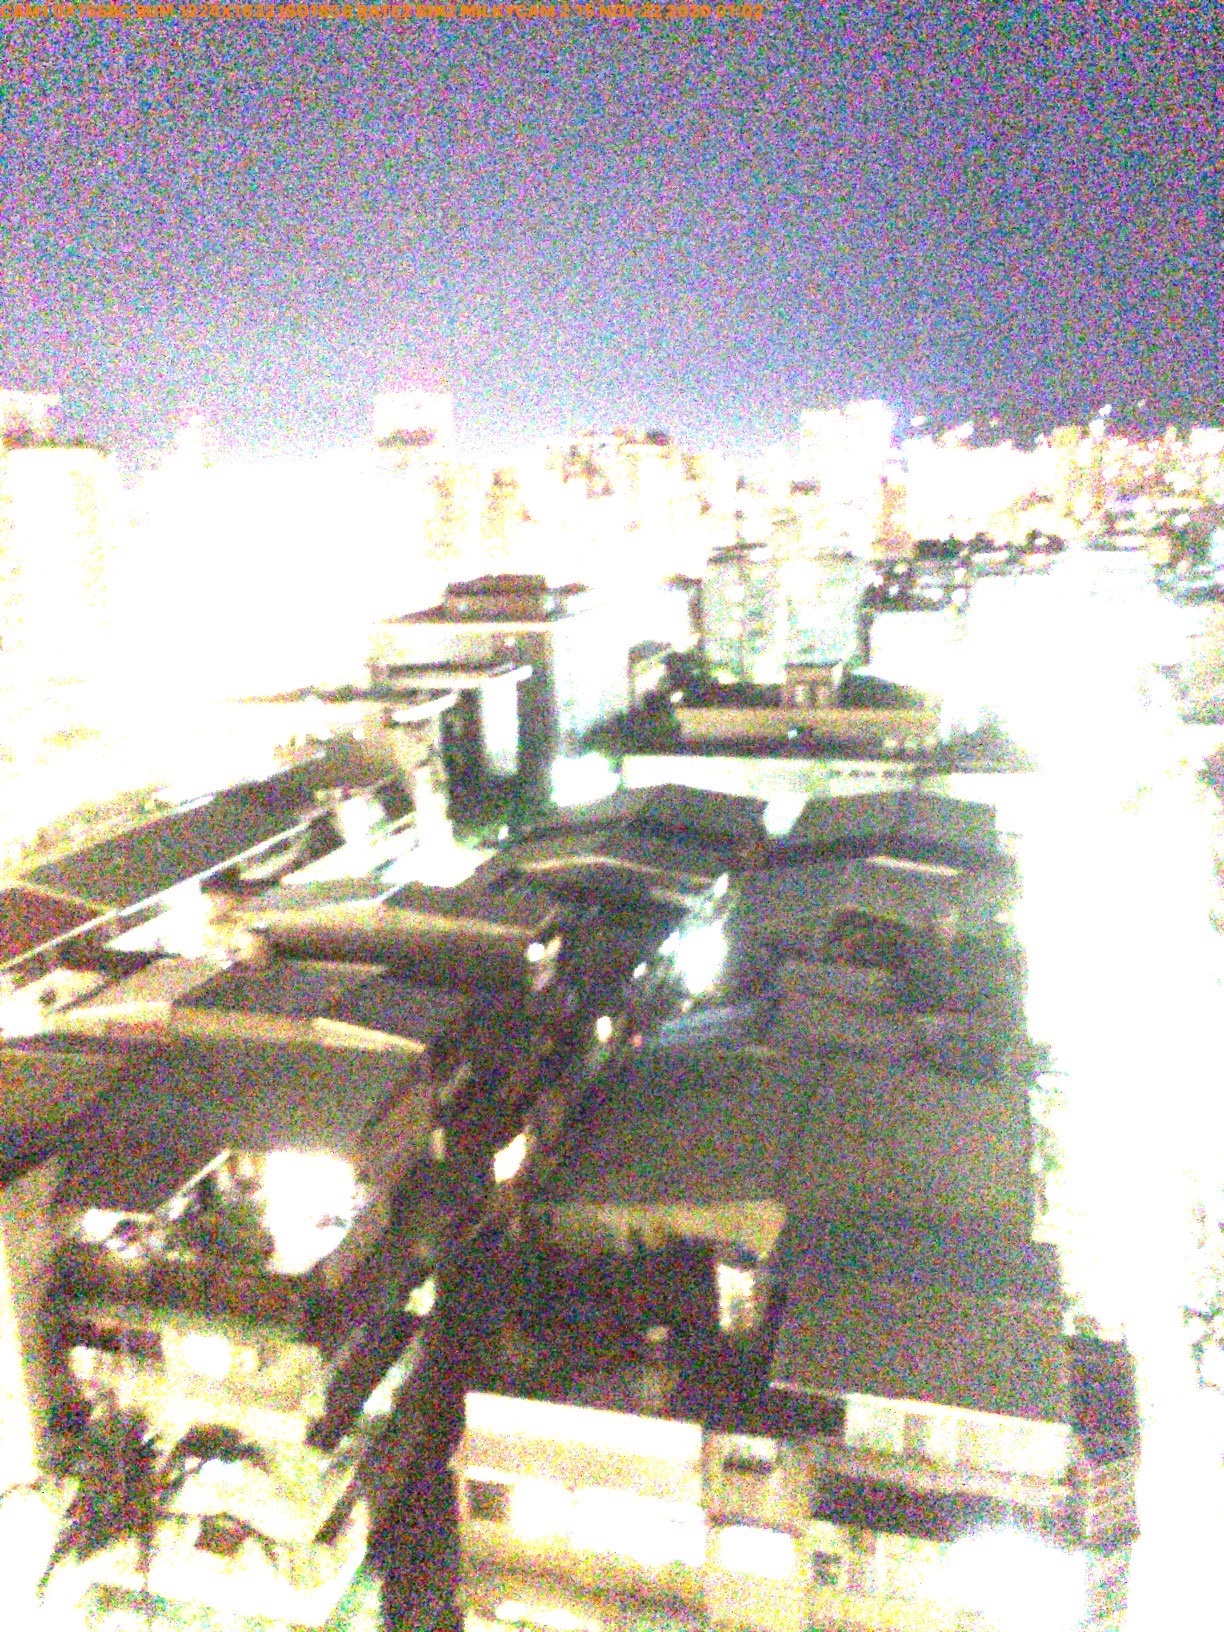
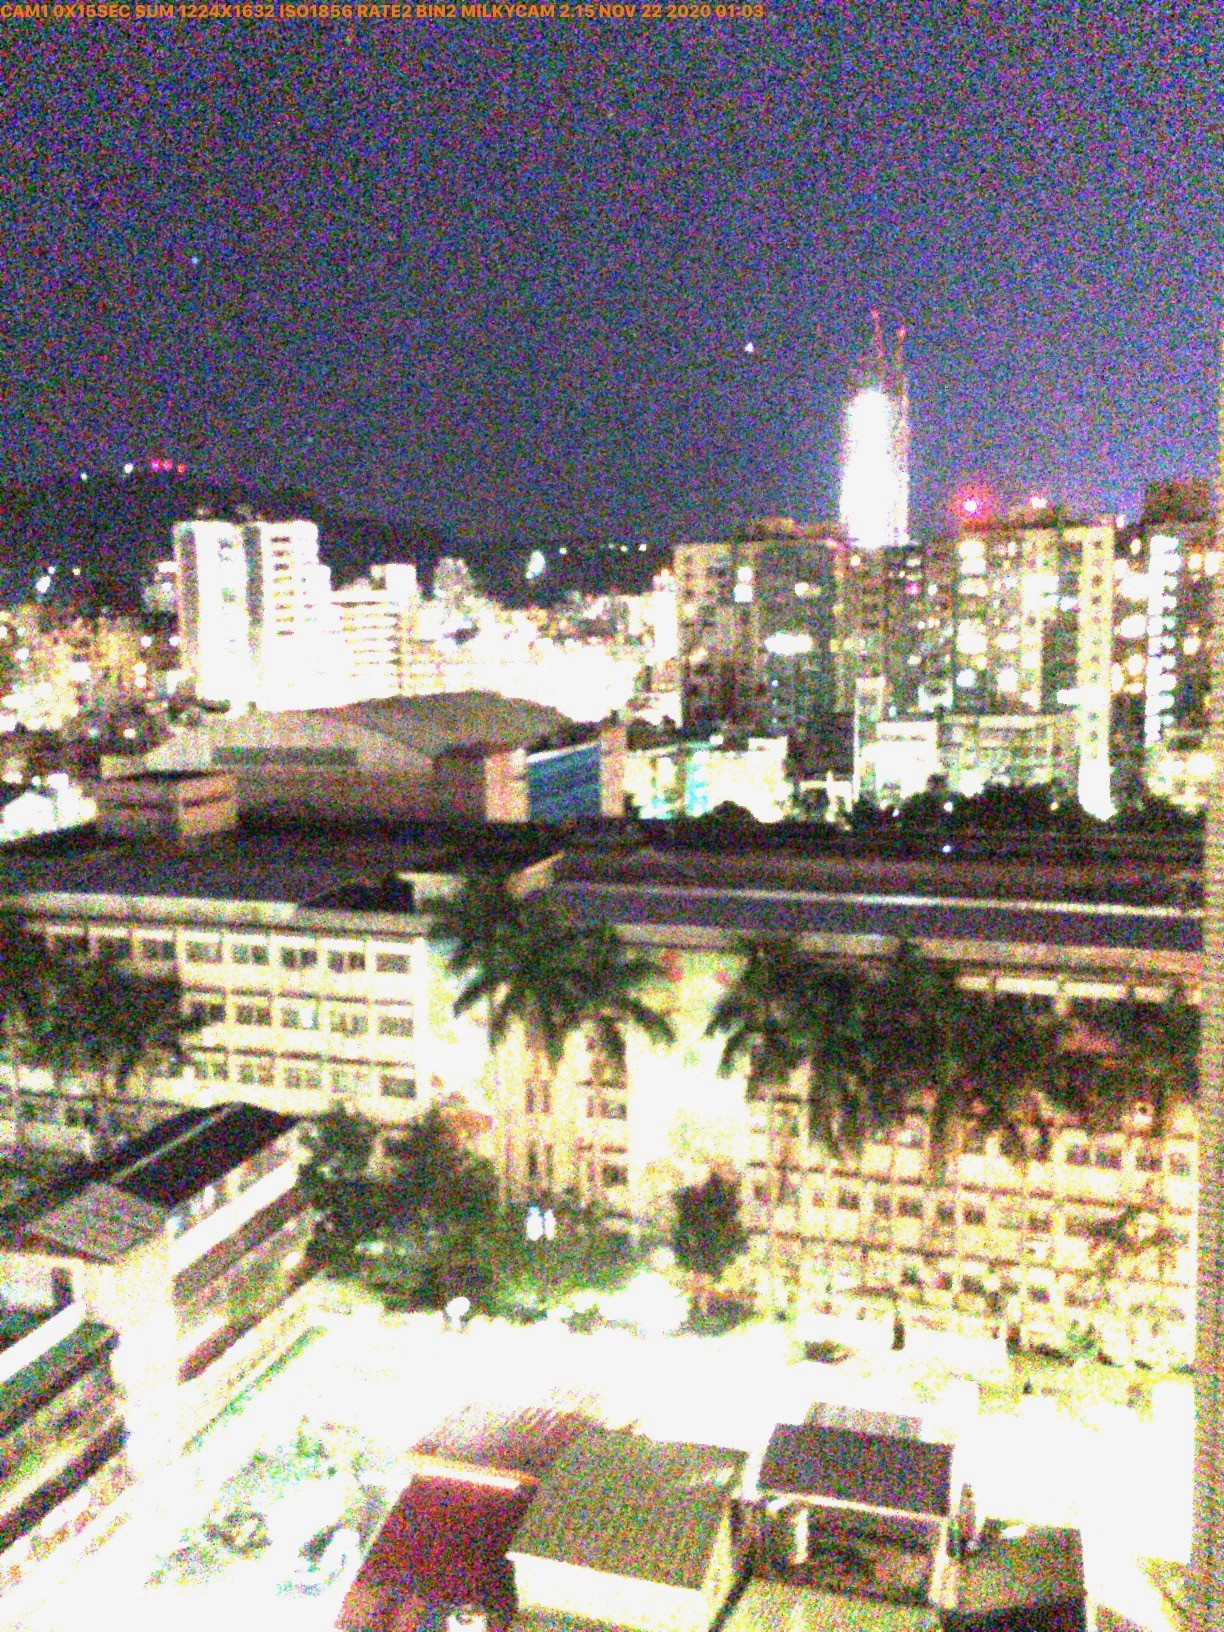
Photo 1 has a large parking skyscraper with large picture windows, illuminated from the inside out on every floor day and night. At the right, is a long stretch of road with an array of street lights that shine upward and down. The background skyline also has skyscrapers blazing with lights.


Photo 2 shows buildings fully illuminated from street lights and lights placed on the buildings that shine up and outwards. The only dark patches are from rooftops and a few scattered trees. The tall skyscrapers are fully illuminated from bottom to top. Every hallway has a window with light. In the first tall skyscraper, at least 12 of these windows are contributing the full illumination of the skyscraper and its surroundings. At the top are very intense lights continuously on, radiating in all directions. Adding more to the light pollution, the building balconies are all illuminated.


Photo 3 shows a tall new skyscraper under construction, and contributing the most to the light pollution problem. Other completed buildings are nearly as bad in light radiation. To the right is sky glow as it points towards the heart of downtown.





Tuesday, November 24, 2020

Brightest Stars


Special Brightest Northern and Southern Stars Event
By a streak of good luck, I managed to see both the brightest star in the Northern Hemisphere in Canis Major and the brightest star in the southern constellation Carina at the same time.


I'm lucky to live in the middle, an area termed as the transition of tropical to subtropical near the equator in the Pacific Ocean, where I can simultaneously see both northern and southern hemisphere constellations.

The two stars, Sirius and Canopus respectively, were found and identified using a planetarium program - Safari - installed on the mini iPad. Then, a special iPhone Xs Max app MILKYCAM was used to take a confirming photo at the extremely fast ISO rating of 1,856. The single image was processed to remove noise grain and city core light pollution, using the app, PhotoScape X, and the iMac operating system. To the right of Canopus is a very tall lighted skyscraper on the horizon that spreads considerable light pollution in all directions. To the right is sky glow from downtown Taipei. The two star-like objects directly above it are red warning lights on the top of the massive crane boom arms being used to build the skyscraper. With the unaided eye, 25 stars were visible in the sky on this clear night. At the top right of the photo is the constellation Orion with the three belt stars clearly visible, along with the Great Orion Nebula. It was considered very lucky to see the southern star Canopus because farther south is obstructed by the horizon and buildings. The raw color photo is unprocessed and shows Canopus near the blazing new skyscraper. This photo shows the city lit by its own light pollution. As 22 photos were captured, it's possible to use other programs to minimize grain and noise by stacking images, for another project.

Photo Data
 CAM1 0X15 SEC SUM, 1224X1632, ISO1,856, RATE2 BIN 2 MILKYCAM 2.15, NOV 22 2020 00:54 LOCAL TIME

Tuesday, September 22, 2020

Flashing


Flashing
Astro
Images

by Mike Otis

All about Flashing. Maybe it's before your time, circa 1970s. We took spectroscopic film and treated it, with baking, or hydrogenating it in forming gas, or flashing it by exposing the film to low level light. We bought kits available from LUMICON.

During 1993,I invented a different kind of flashing, by exposing an active CCD sensor (SBIG ST4) to low level light. For the first time, itallowed remarkable images with ultra
short exposure times. My paper was published in Observatory Techniques Magazine, Fall 1993, Issue #7. As that issue is rare and out of print, the entire article is reproduced from my personal collection (see photos).

In 2020, I invented another kind of flashing, again - this time, with computer image processing. Recently while experimenting with astro image processing on images of deep sky with only a few seconds exposure, I repeated the process of flashing, by putting a low level baseline across the image. Originally intended as a trial way to shoot in bad light pollution, extract images and improve the results, the side effect was to improve the image in a similar manner as the other two methods of flashing. Results are preliminary, but it does show there are ways to take exposures of a few seconds through light pollution and extract images.

Saturday, September 19, 2020

8 Bright Stars Orion Area

Brightest Stars Around Orion
Source

Currently at around 4 am, the sky displays the constellation Orion and these bright stars. The Great Orion Nebula is an ideal First Light target for a new working eVscope and the eight listed vicinity stars are perfect for focus and mirror calibration. All listed stars are brighter than second magnitude.

Betelgeuse - Orion (0 to 1.6 mag)
RA 05h 55m 10.3"
Dec +07° 24′ 25.4"

Rigel - Orion (.13 mag)
RA 05h 14m 32.3"
Dec −08° 12′ 05.8"


Sirius - Canis Major (-1.46 mag) Dog Star
RA 6h 45m 9s"
Dec -16° 42′ 58"

Aldebaran - Taurus (-.75 to -.95 mag)
RA 04h 35m 55.24"
Dec +16° 30′ 33.5"


Capella - Auriga (.08 mag)
RA 05h 16m 41.4"
Dec +45° 59′ 52.8"


Castor - Gemini (1.58 mag)
RA 07h 34m 35.9"
Dec +31° 53′ 17.8"

Pollux - Gemini (1.14 mag)
RA 07h 45m 18.9"
Dec +28° 01′ 34.3"


Procyon - Canis Minor (.34 mag)
RA 07h 39m 18.1"
Dec +05° 13′ 29.9"

Based on the maps, the following vicinity objects are available
Map 1
NGC 2238
M78
M43
M42

Map 2
M35
M36
M37
M78
M1

Map 3
M35
M36
M37
NGC 2238

Friday, September 18, 2020

Unistellar Evscope Aftermath

The night sky is perfect for
running a new working

eVscope through its
paces. Visible is M42, and
bright stars like Sirius,
Capela, Rigel, Betelgeuse,
and Aldebaran at around
4:30 am local time.


The Story of Unistellar's Evscope Aftermath

It all began August 8, 2020, when my Unistellar eVscope telescope order was confirmed and the credit card was cashed for $2,999.00 and $242.99 shipping. At Customs, around 10% tax was added, an additional $350, for a total of $3,593.00, all paid in full.

In the aftermath of receiving a non-functional eVscope through OPT telescope dealer in the USA, I waited over 20 days for a replacement MicroSD card from Unistellar.

After installing the new card, the scope was still non-functional and remained stuck on the purple power light, the exact same problem as before. As of Friday, September 17th, 2020, I'm waiting for instructions from Unistellar for telescope replacement. As this telescope was assembled in China, and apparently not checked in China, not checked in France, and not checked by the dealer OPT, I reminded Unistellar to test the new telescope under the night sky before shipping it.

Thursday, September 17, 2020

Unistellar Evscope After Card Install

Who knows where the eVscope anomaly is located... it's a mystery the best minds
in the astronomical world have yet to solve! We know, when fully functioning,
other eVscopes are cited by owners to be an absolute wizard in automatic
alignment, and doing everything for you including taking stacked and processed
token photos. The updated app is said to now take full frame rectangular images
with a greater FOV. It even does automatic dark frame subtraction and has
superior goto and 
guiding accuracy, as they claim. Light pollution is combated
with 3 second stacked exposures using a low noise level SONY IMX224 CMOS
detector with a resolution of 1.2 million pixels (1305x977). The scope can give
views like a 40-inch classical telescope according to observer testimonial and
digital light gathering ability is up to 100 times more than a classical telescope.


This is the digital eVscope telescope by Unistellar, changing the world! The telescope calibrates itself - you don't need to do polar alignment or find and  center calibration stars. The telescope is automatic. This is fantastic for people living in light polluted urban core cities where stars may not be visible. It's great for skyscraper dwellers on a balcony that have over half of the night sky blocked by the skyscraper, side walls, and an overhanging roof partition.

Evscope Slated for Operation
This is the story of the Unistellar Evscope after the card with new software was installed. Unfortunately, the telescope has exactly the same problem and is stuck on the purple power light. Unistellar assures me the telescope will be replaced with priority and the details are being worked out.

Card Replacement

Sky Conditions
We are currently undergoing a period exceptional skies after midnight, with improving darkness until 4:30-5:00 am local time. Venus is rising and Orion is high in the sky with the Great Orion Nebula ideally placed for observing. It would be a great first light object for a new telescope. There are numerous bright stars for telescope focus and mirror calibration. Generally it rains in the daytime and clears late in the night. Rain cleans the sky of dust and pollution and often the transparency reaches a high point. We look forward to getting a perfectly working eVscope before either typhoons startup or the rainy Monsoon season begins.

Wednesday, September 16, 2020

Evscope Card Replacement

 Evscope Card Replacement

If you have the beautiful and amazing new eVscope and Unistellar has determined it needs new software for proper functioning, a replacement microSD card may be needed. This is the story about how the card was replaced.

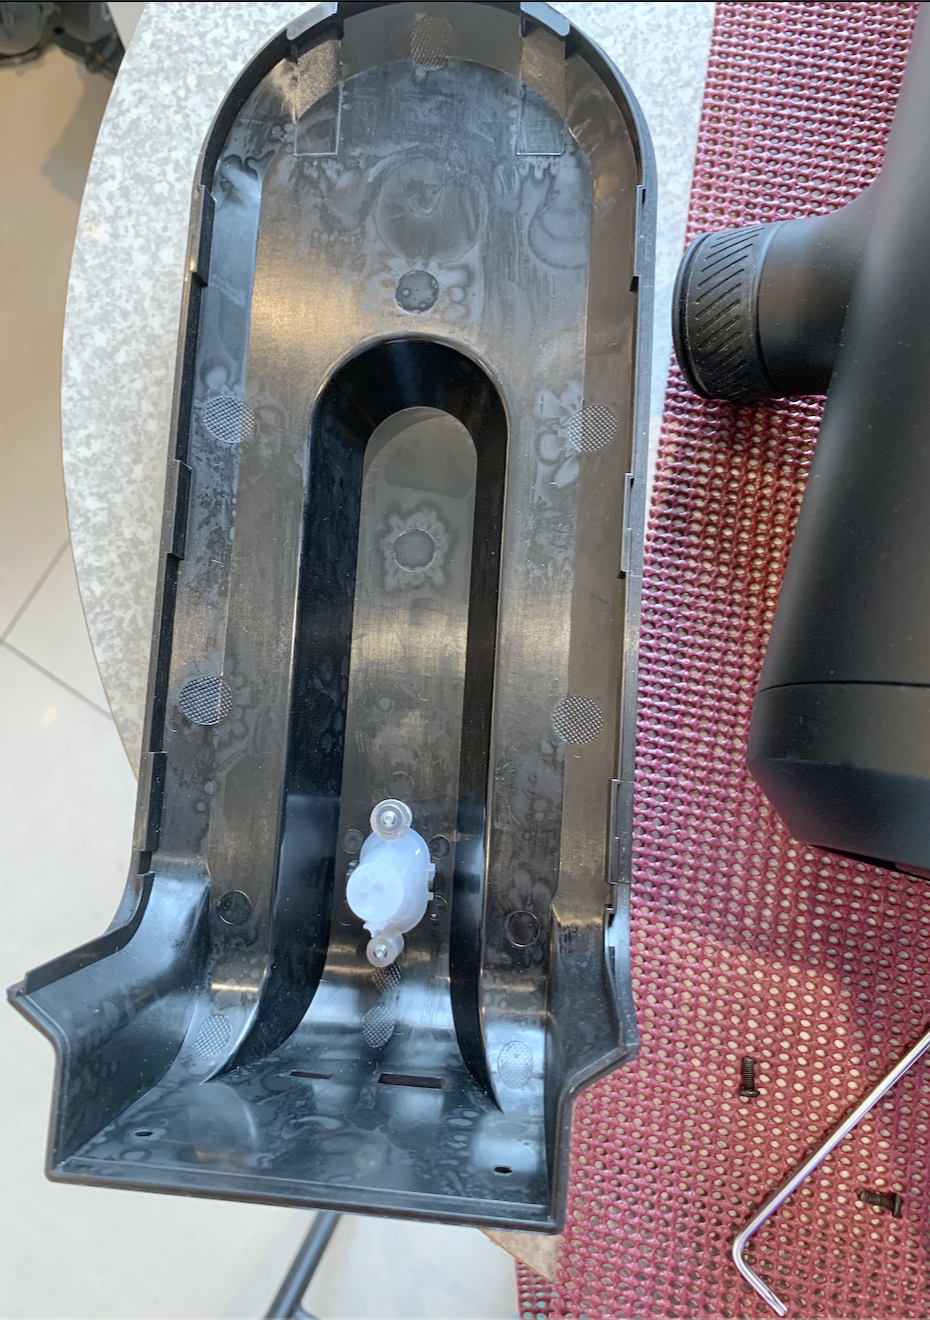
Remove the eVscope from the tripod and set it on a firm table with a special anti-slip grip matt. I used this arrangement to prevent any slippage during work and in the event of a sudden earthquake.


The security screw removal tool is everything - Taiwan makes this amazing TORX tool set forged from S2 Steel. One side is T10 Torx and the other side is TT10 Torx. The TT10 side has a center hole for removing the two security screws on the Unistellar telescope. (the security screw has a center peg) This Alstrong Tools Corp. www.alstrong.com toolset, made in Taiwan, was in stock and purchased today at a local hardware store in Taipei. It was conveniently located down the street, for only $13, a real bargain! The nine piece set name is "Extra long arm L tamper star wrench set, part number CDT-09X." Now it's time to remove the two screws, located one on each side of the telescope label.

With the two screws removed, slide the top cover plate, which includes the power switch, back towards you and remove it. Be very careful not to force anything.


You can see the second board under the top board. In the center is the microSD card. Fingers were used to feel the sensitivity of the card, its position, and then it was grabbed and gently removed. Then immediately, the new card was inserted, observing the cards position, top and bottom. Tools were not used to grip the tiny card as it could easily become flexed and damaged if using metal tools on it. Sometimes metal tools become magnetized and these can damage, modify or erase data stored on the card internally. Use common sense and exercise caution.


Now put the cover back on and install the screws. These screws have only slight pressure to hold in place. Now put the evscope back on its tripod do the first test - push the power button and hold a few seconds. The purple light will come on, release the switch, the light will stay on a short time followed by constant red light and you're good to go! The telescope should successfully boot up with the new software on the new MicroSD card.

When outside, remember to take a dark frame, then run more tests with the latest version app, take pics, etc. - ultimately focus on a bright star using the Bahtinov mask and also collimate the primary mirror. It's raining now but at 4am we're scheduled to have a beautiful clear sky with Venus and the Orion Nebula climbing high. We'll report how this goes in more blogs so stay tuned!

Tuesday, September 15, 2020

Evscope Security Screw

Evscope Security Screws Removal
Unistellar and telescope owners loosely recommended a T10 Torx screwdriver to remove the telescope housing and replace the SD card. This is not precisely true. As T10 is a security screwdriver, I checked and had these in my toolbox and didn't give it any more thought. However, after the card arrived on Tuesday September 15th, I prepared to remove the telescope case and suddenly the screwdriver did not fit.

Left: Closeup of a required TT10 wrench bit needed for eVscope screw removal has a central hole

Actual screw on the eVscope that needs removal. 
A TT10 tool is needed - the screw has a center pin.

The small black screws on the black telescope needed a magnifier to see what was going on. I used the iPhone X camera at 2x and discovered a central pin in the telescope screw. The T10 Torx wrench would need a center hole to work, which it did not have. Further study showed the required tool is not a T10 but rather more precisely a TT10. Photos of a TT10 wrench on the web 
confirmed this. 

At left, This is a T10 that will not work to remove the eVscope screw. At right, this is a TT10 screwdriver incorrectly labeled as a T10.

The big problem was half the screwdriver tools listed were incorrectly labeled, as seen in the photo with the blue handle screwdriver. This is clearly a TT10 incorrectly labeled as a T10. The TT10 screwdriver/ wrench has a central hole and the T10 does not.


Urban Heat Island

Urban Heat Island
Changes Sky Seeing Conditions

Urban Heat Island Defined

An urban heat island occurs in cities when the natural landscape is replaced by pavement, buildings, and other surfaces that absorb and retain heat. As a result, the materials create a hotter environment than rural areas. Temperatures can range from one to three degrees hotter during the day, and from three to seven degrees hotter at night! This “heat island effect” leads to increased energy costs, air pollution levels, and heat-related illnesses.


Los Angeles USA
Due to the Urban Heat Island (UHI) effect, Los Angeles air temperatures can be up to 19°F hotter in urban areas compared to surrounding communities. This is because urban areas typically have more roofs and paved surfaces that absorb and radiate solar energy as heat instead of reflect light, coupled with a lack of trees and green spaces to cool the city down. Los Angeles currently experiences the highest UHI effect in California, which can be linked to the urban composition of the city.

Taipei Taiwan
In Taipei, urban island heat is the product many sources inclusive of air pollution, smog, smoke, particulate matter content in the air, humidity level, black paved streets, concrete sidewalks, air conditioners running day and night, homes with metal roofs, concrete and bricks instead of trees and grass, skyscrapers built with concrete, granite, marble, and tiles, rock, hot lights, cars and trucks, trains, buses, subway systems, construction equipment, direct sunlight without shade, bridges, lack of airflow, etc. and the retention of heat by other means.

Quick Fix to Improve Sky Seeing Conditions
by Minimizing the Urban Heat Island

* Make use of green plants and grass for landscape
* Observe before the sun rises when things cool down
* Erect fabric reflective silvered or white shades & awnings
* Maximize the daytime albedo
* Keep astro equipment indoors during the hottest times
* Hose down paved surfaces with water for cooling evaporation
* Remove mass objects that store thermal energy such as rocks
* Observe times of less humidity
* Monitor periods of less air pollution
* Be aware of atmospheric thermal conditions
* Observe periods before and after a storm front
* Utilize conditions after a rainstorm
* Make effective use of a light breeze or wind

Monday, September 14, 2020

Moon & Venus

Crescent Moon & Gibbous Venus

Monday morning, September 14, 2020 , Apple iPhone XS Max camera 4.25mm f1.8 2858x3812 790K, HEIF, ISO 2500 1/4 sec. exposure, 4:28 am, rising over Taipei Taiwan. Below: enlargement showing the phases, Moon's Earthshine, and the phase of planet Venus. Need to check other photos to identify star occultation.


Sunday, September 13, 2020

Light Pollution Limiting Magnitude


Most of the light pollution is already subtracted in this image. For the sake of illustration, some light pollution is retained on the photo, which appears as a green tinted noise. This sheen can be eliminated almost completely, however there is a reduction in the brightness of stars. 

Image Details
With Apple iPhone 6 Plus, 4.15mm f/2.2, 3264x2448 2mb, ISO 3712, 1/4 second exposure, taken with Nightcap app. The image is processed with Apple iMac to remove most light pollution noise. This is a determination of the photographic limiting magnitude given this particular sky, camera and app.

Determination of Limiting Magnitude under Taipei Light Polluted Skies
Morning of Monday, September 14th, 4:37am

Sky Portal Comparison
The planetarium program SkyPortal was used to screen capture at approximately the same time view at left and identify the dimmest star seen in the photo as 2.05 magnitude Kappa Orionis. Another star at 2.77 magnitude is seen near the Great Orion Nebula, still not enough to reach the Bortle 9 rating.

Visibility Limit
To the left of Kappa Orionis, and at the limit of visibility in the noise is a tiny spec, the star Gamma Monocerous at 3.98 magnitude.

Magnitude Matching
For stellar identification purposes, dial back the limiting magnitude of the planetarium program - in the second screen shot, the star magnitude is set to 4.4 to match the photo as best as possible.

Bortle Rating Insignificant
This is the limiting photographic magnitude of this particular image.  The limit of the Bortle rating is 9, for naked eye objects detected at magnitude 4. However this sky has light pollution  worse than Bortle 9 by another magnitude. The Bortle scale is useless for light pollution ratings in inner core cities.


OTIS Scale
I use the OTIS scale which uses a direct relationship with the visible star magnitude. A sky that shows only magnitude 3 stars is rated as a 3. As the number ratings become larger, for example 5, the sky becomes more clear with less light pollution. The OTIS scale allows rating the most light polluted inner core cities such as New York, San Francisco, Tokyo, Taipei, etc. and can go beyond first magnitude into negative magnitude numbers.

Conclusion
This sky is precisely OTIS Scale 3.98 on the image. On this night, a maximum of twenty stars were visible within the Eastern patio sky window. With the advent of EAA and digital telescopes that can image in bright light sky pollution from the center of core cities, the Bortle Scale stops and reaches a limit where the OTIS Scale continues.

Taipei Sunset


Taipei Sunset in Taiwan this Evening

While waiting for the clouds to clear for telescopic astronomical imaging of deep sky objects, this dramatic and unusual sky vista appeared. Shot with a handheld iPhone X camera set on automatic exposure, Sunday September 13th, 2020, showing true sunset colors. Looking like paintings, the photos capture the incredible variety of cloud systems at one time. No rain or storm today but there was a beautiful rainbow yesterday, shown below.